MAX POWERS:
“ LIVE MORE DYNAMICALLY.”

Max had an active youth, playing soccer and football from adolescence through college. He then continued his evolution in the world of martial arts, specifically Brazilian Jiu-Jitsu. It was through this practice that he discovered the importance of mobility, one of the pillars of his training philosophy. According to him, being functional is the basis of good physical fitness. The development of strength and endurance should not come at the expense of flexibility or coordination. Today, he defines himself as a functional trainer.
INTERVIEW WITH MAX POWERS
What is your go-to workout playlist?
These days I like the band Branko. I have 3 styles that I listen to in rotation: Afro Beat, Hip-Hop, and in the morning, I like listening to Soul music.
What is your training philosophy?
The important thing is to be consistent, so it is necessary to find a fun physical activity or sport that makes us want to come back regularly. This is what will give us better long-term results. I also advocate developing three aspects of training: mobility, strength, and endurance or cardio. Personally, I believe that the best athlete is the one who can adapt to different forms of movement and perform at a high level.
Tell us about The Warriors MVMT.
This is a project that I developed during the pandemic, with a friend, to allow people to continue exercising outdoors while respecting the health measures put in place. It was a success! I believe that it lifted the spirits of everyone who participated in it.
Tell us about your abdominal workout.
We all know there are various ways to stimulate the abs, but I created different movements to spark inspiration and think outside the box. Essentially, this muscle group aims to stabilize the spine and protect vital organs, so I introduced some plank movements as well as flexion movements to strengthen this function. The goal of the movements is to focus on the quality of execution rather than the number of repetitions.

Side Plank with Band Row

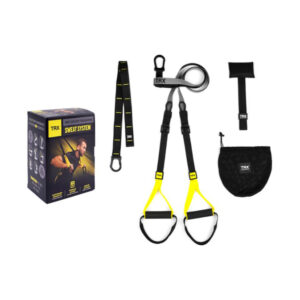
TRX Hamstring Curl and Bridge

Russian Twist on Stability Ball
ABS Workout
https://www.youtube.com/watch?v=nKVEOsqp_Sc
Begin the exercise in a plank position with the tops of your feet resting on a stability ball. Ensure you position the ball between the lower half of the shin and your shoelaces. As you brace your core muscles, simultaneously start bringing your knees to your chest as you raise the glutes a few inches to avoid compressing the lower back. Reverse the movement by returning your legs to full extension to bring you back to the starting position.
https://www.youtube.com/watch?v=_Zb3ZUqjNKg
Begins the exercise by sitting on a stability ball, holding a dumbbell with both hands close to the chest. Transition into the working position by slowly walking your feet out and rolling the stability ball along your back until you find yourself in a position where your legs are bent at 90 degrees and the ball is located between the shoulder blades. Make sure to activate the glutes and hamstrings to keep the shoulders, hips, and knees in a straight line, and to prevent the hips from dipping.
Holding the dumbbell overhead with your arms in full extension, ground your feet and start to twist the trunk (eyes follow the dumbbell) over to one side with control. Once you’ve reached the point where you feel you might lose your balance, return back to the center and twist to the other side. Your range of motion will increase as your core gains strength.
Begin the exercise in a high plank position with the tops of your feet resting on a stability ball. Ensure you position the ball between the lower half of the shin and your shoelaces.. Once you’re stable in your plank, begin to hinge at the waist and the shoulders bringing your hips to the ceiling and keeping your legs straight until you reach a pike position. Reverse the movement by lowering the hips back down until your return to a plank position.
https://www.youtube.com/watch?v=mDVGMN5KDrE
Begin the exercise by standing with your feet hip-width apart, holding a kettlebell (or dumbbell) with both hands. With the weight securely held, bring it to eye level and begin to circulate it in one direction making tight circles around your head. Once you’ve completed a full rotation in one direction, reverse the movement in the opposite direction.
https://www.youtube.com/watch?v=JDW4psp4Dt8
Begin the exercise standing with your feet hip-width apart, with your arms at your sides holding a kettlebell in one hand. Keeping your core engaged, begin to slide the kettlebell down the side of your body by hinging laterally at the hips. Once you’ve descended as far as you can without compromising your posture (no leaning forward), begin your ascent to your standing position. Repeat the prescribed amount of reps on one side before transferring the weight to the other hand and completing the exercise on the opposite side.
https://www.youtube.com/watch?v=Zgvbz45emY8
Begin the exercise standing with your feet hip-width apart, holding the kettlebell (upsidedown) by the horns at chest height. As you step the left foot back about a foot, bring the kettlebell over the left shoulder, twisting at the trunk. Proceed by stepping the left foot forward past the mid-line simultaneously bringing the kettlebell to the outside of the right hip with control. Repeat the prescribed amount of reps on one side before switching to the other side.
https://www.youtube.com/watch?v=Mc03ahyI21Y
Begin the exercise in a static lunge position holding a medicine ball with both hands. Twist your trunk to the side of the leg that is behind the mid-line and hold the medicine ball at your hip. Keeping both feet planted, follow an arc trajectory with the medicine ball bringing it up and over in a dynamic movement to your opposite hip.
https://www.youtube.com/watch?v=pWuWDZRsTtU
Begin the exercise seated on the ground with a resistance loop around both feet (at the arches) and holding a medicine ball with both hands. Lower onto your back with your legs in a tabletop position and arms extended over your chest with the medicine ball. Extend one leg, keeping the other in the 90-degree tabletop position, and proceed to reach the medicine ball to the ceiling by contracting the core and raising the shoulders off the ground. Lower the shoulders back to the ground maintaining the leg position. Complete the prescribed number of repetitions before alternating the extended leg.
https://www.youtube.com/watch?v=MUoG2kdlhIE
Maintaining the same lying position as the “dead bug”, hold the medicine ball over your head. With the resistance loop around your feet and one leg extended, begin to raise your legs by contracting your core and hinging at the hips. Once you’ve reached full contraction, maintain a strong core and begin to lower the legs in a slow and controlled movement. Be mindful of your lower back and make sure that it doesn’t begin to arch on the descent.
https://www.youtube.com/watch?v=ixJF43P7RTk
Begin the exercise by securely anchoring a resistance band about 2-3 feet from the ground. Position yourself at a distance where you feel you will have enough resistance on the band to challenge you through this movement. Proceed by setting yourself up in a side-plank position with your top foot resting on a step. This will allow your lower leg to be suspended and can be bent to accommodate space. Once you’re feeling stable, your free hand will reach for the resistance band and you can begin the rowing movement by pulling the elbow back and contracting the back. This movement requires a lot of concentration and stability forcing you to engage the muscles in your whole body. Slow and steady is the key. Complete the prescribed number of repetitions before switching to the other side.
https://www.youtube.com/watch?v=5xbfS99EuOA
Part A – Curl
Begin the exercise lying on your back, arms at your sides, and with your heels placed securely in the cradles of the TRX suspension trainer. Pushing your heels into the straps, raise your hips off the ground keeping your hips turned inwards and your core engaged to avoid arching the back. From this position, begin pulling the heels into the glutes while simultaneously raising the hips to the ceiling. Once you’ve reached your limit (right before you’re about to feel the lower back arch), begin a controlled descent by lowering the hips and extending the legs back to starting position.
Part B – Bridge
The bridge is executed in the same position as the curl, however, the hamstrings remain activated in a hold throughout the movement. With your knees bent and held in a hamstring curl position, proceed to lift your hips toward the ceiling. Without moving your feet, lower your hips until they are hovering a few inches above the ground. Repeat by raising and lowering your hips for the prescribed number of repetitions before releasing your legs into extension.
https://www.youtube.com/watch?v=sW8Dma5mDQs
Begin this exercise standing parallel to the TRX suspension trainer. Holding both handles with both hands above your head, ensure that there is tension on the TRX suspension trainer by adjusting your distance from the anchor. Once you’ve established a secure standing position, slowly begin to push your hips away from the anchor, arching your body laterally. Find the point where your obliques are being challenged and pause, and keep the core muscles engaged. Once you sense the muscles approaching failure, bring the hips back to the midline. Change directions and repeat on the other side.
https://www.youtube.com/watch?v=U9s2vUFZxNA
Begin the exercise by securely anchoring a resistance band overhead. Position yourself in a tall kneeling position underneath the hanging band. Holding the band with both hands behind your head, engage the core and begin hinging forward at the hips as if to bring the elbows to the ground. Once you’ve reached maximum contraction, slowly return to the starting position in a controlled movement to avoid having the resistance band pull you back abruptly.